You can download Zerovision's original ANSI tutorial file in .ANS format here.
Welcome to the How-to-draw-like-zerovision ansi tutorial.
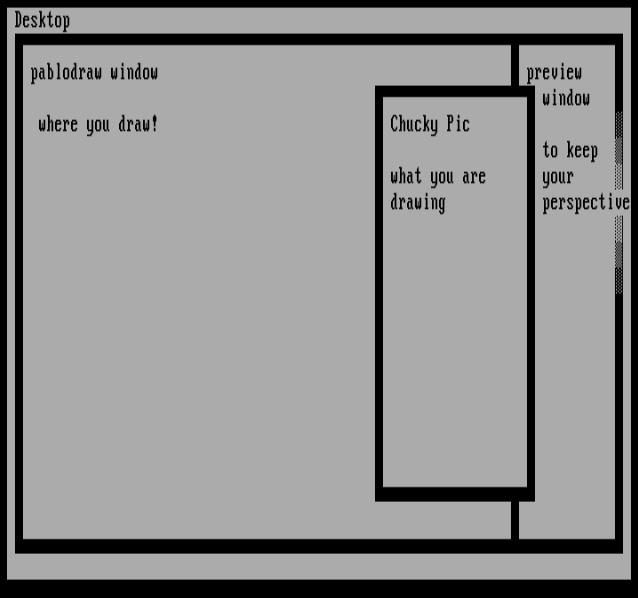
First thing is to fire up Pablodraw and maximize the Window.
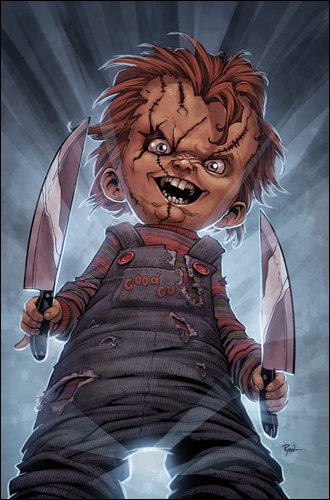
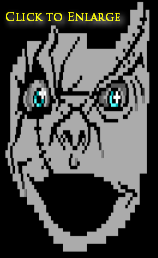
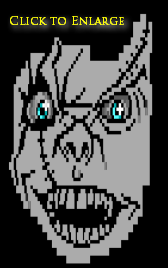
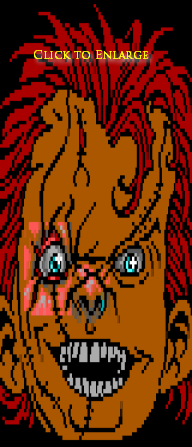
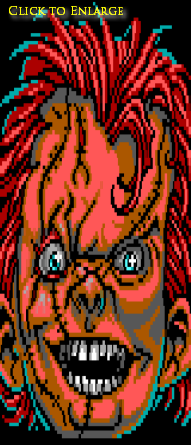
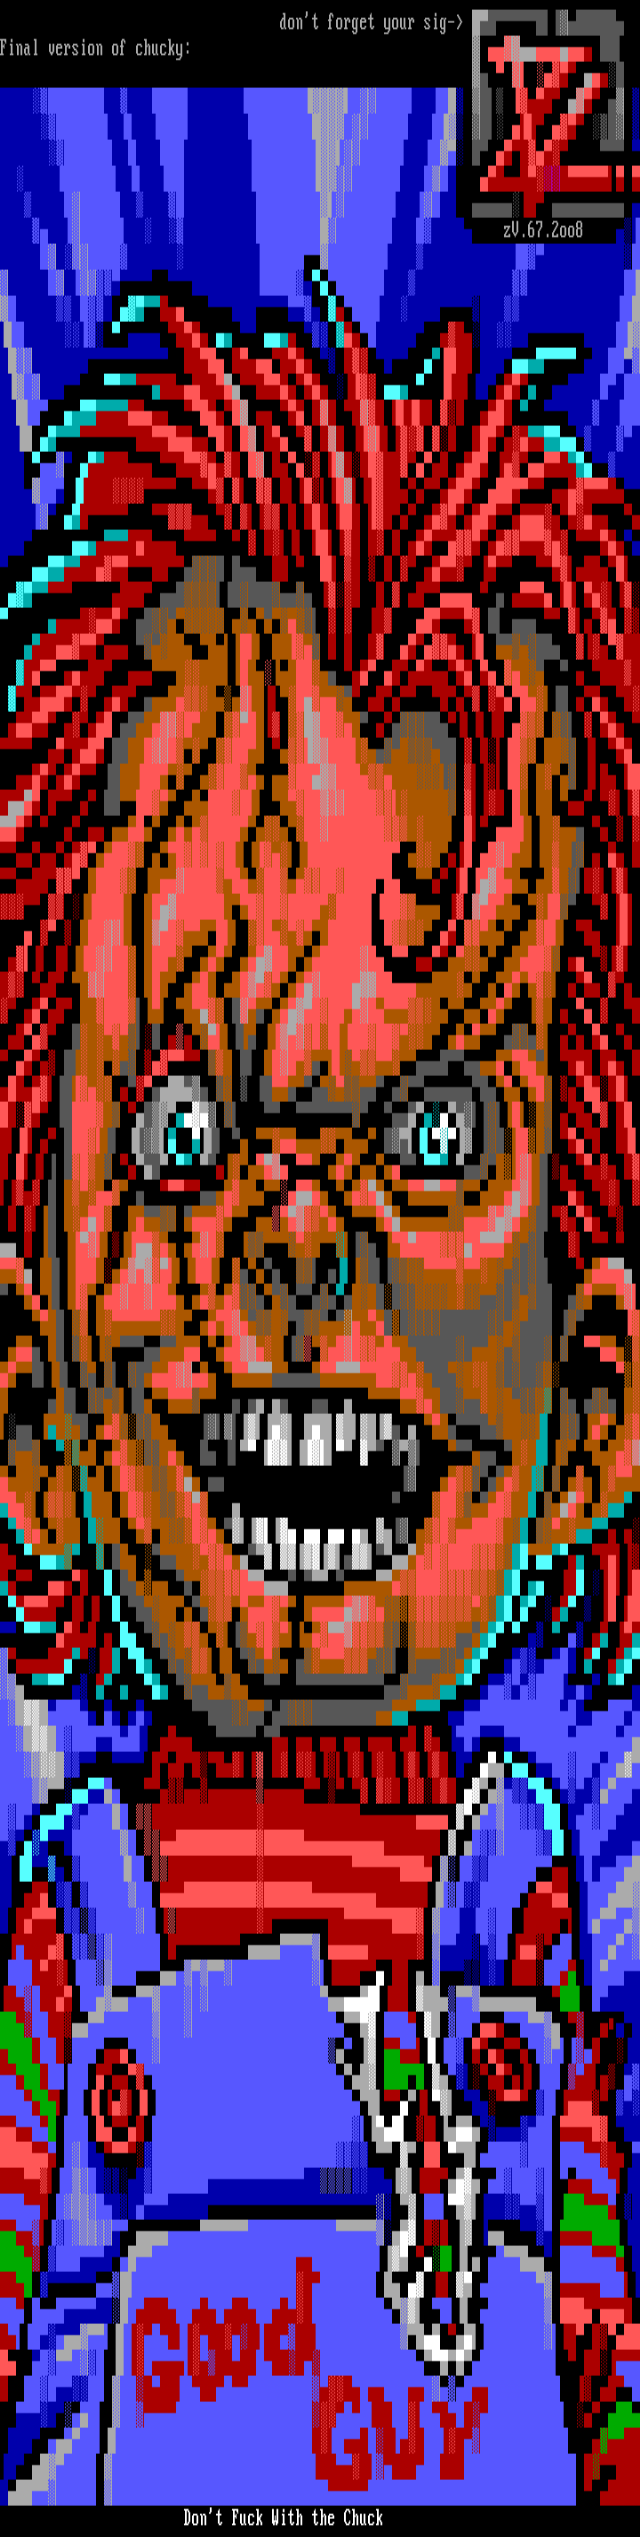
Next thing to do is to find something you'd like to draw, someone requested Chucky the other day, so I google "chucky" and pick a picture.
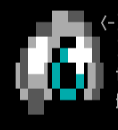
Source Picture --->
|
|
I save the picture to my desktop and open it in a viewer that has the option to be "always on top" and place it like so.
I use acdsee for the image viewer just fyi. NOW first thing i do is start outlining the eyes. It also sets the scale for rest of the picture.
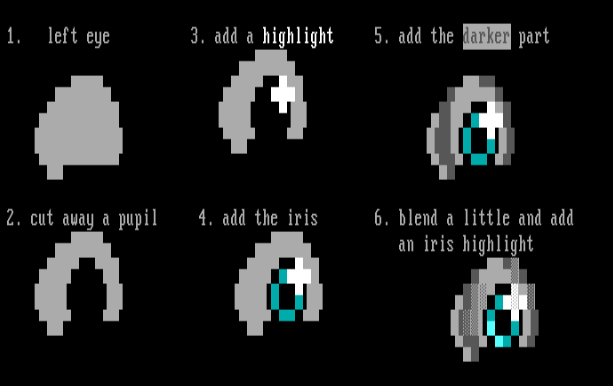
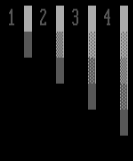
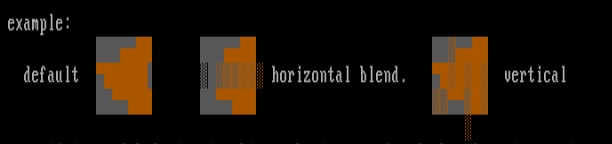
OH, before i go further, color theory... This is ansi, you will never duplicate the detail found in high-res stuff so just use a best guess when doodling, i omitted the eye highlight because it wouldn't look as good, because darkgrey will never shade into white.
 |
|
like this. I can't shade smoothly from white to darkgrey in 1 step. The amount of space you have determines the ability to change from one color to another, example:
|
 |
|
The moral? draw BIG, you'll have lots of room to screw up better :). 4 steps looks better and smoother than a sharp transition. There's also funky things you can do with colors.
|
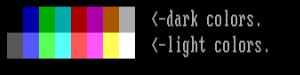
you can use the f3 bright color to sort of match the equivalent dark color
|
 |
|
very close to being the same
|
like so, it adds a bit of interest to boring areas.
Back to chuck!
Continue more detail around the eye, nothing special just grey lines to help shape things.
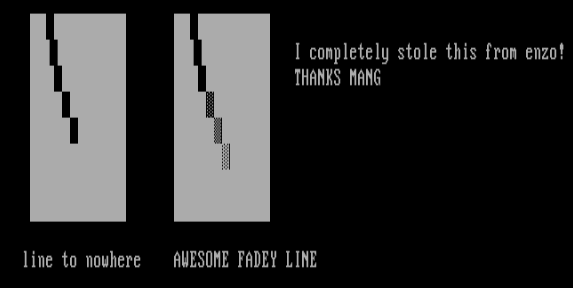
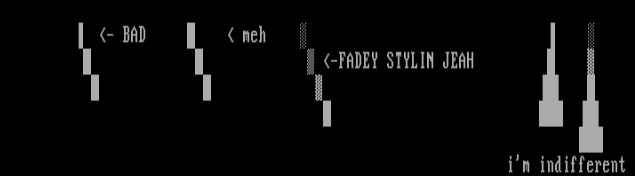
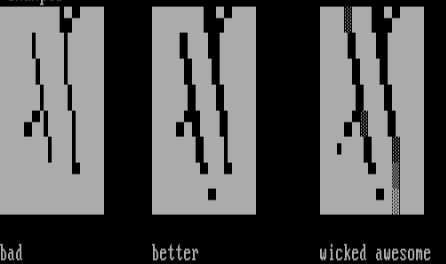
and then when you combine the different angles you get...
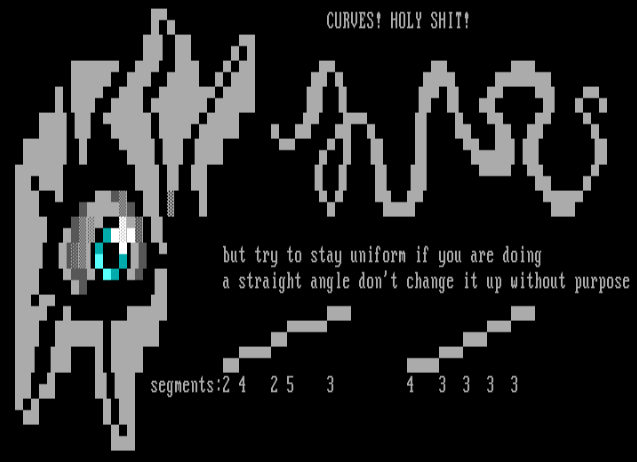
Two lines that lead from the same start point to the same end point but one looks like ass, guess which. Don't randomly change segment lengths unless you are curving with a purpose.
/end line rant
Sorry, Back to chuck!
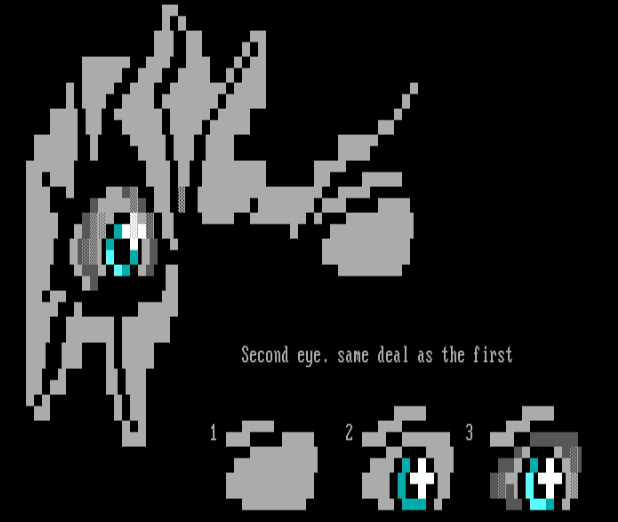
Note: I adjusted the white slightly for height to accomodate the pupil cause i'm cool like that. I try to bridge over as quickly as possible to the other eye socket keeping the same scale.
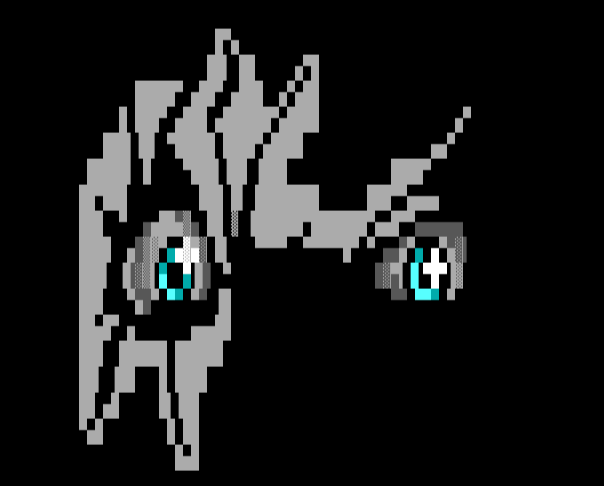
It's usually at this point when I look at the preview pane and decide if it's too big or too small, at the right angle, and I try to center things.
The source picture is angled slightly, I can either ignore the angle and draw with my head slightly tilted or try to adjust the right eye (his left) to be lower than the left. Obviously, I'm a lazy screwup so I keep going.
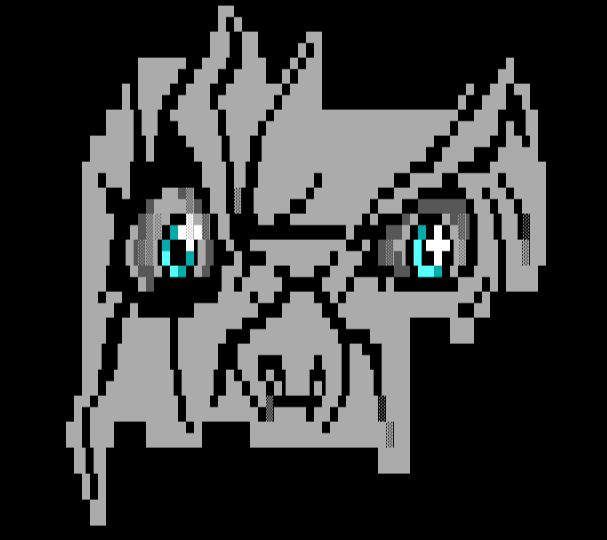
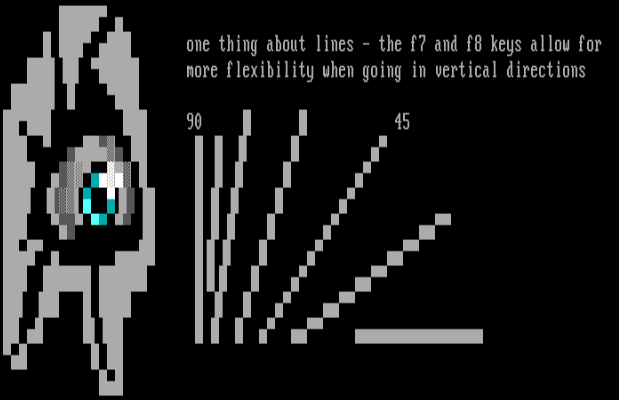
still just adding lines, got a little nose going there. More notes: when a line trails off to nothing like this:
More more notes: a friend once told me I had to adhere to rules like I couldn't leave an isolated f7+f8, it fucked me up and i still have nightmares about ansi rules so I won't impose any on you guys. Please break all rules, if it looks good.
I also try to always leave 1 width black space. example
But again, i'm not setting rules, don't follow my rules, draw how you want.
|
|
More lines, getting some stiches and a mouth, slightly adjusted nose, etc.
|
|
The best tooth tutorial you will ever get is to draw something by dale keown, especially pitt or the hulk where he's grimicing. Seriously go look him up.
|
|
From the eyes, about an inch, i draw around the hair line and outline around the top. Refer to the source to view my train of thought.
|
|
Continue around head to form the jawline. I'm still only making lines. That's what drawing is. One line forms a shape.
Remember: you can't draw this exactly like the source. If it was, it wouldn't be ansi, any mistakes you make are happy mistakes and they make this picture your own. A dozen people will draw the same tree a dozen different ways, always.
|
|
For the sake of this tutorial i'm going to stop here cause i don't like cutting and pasting this big noggin around. HAIR! hair is just lines and more lines, following one another
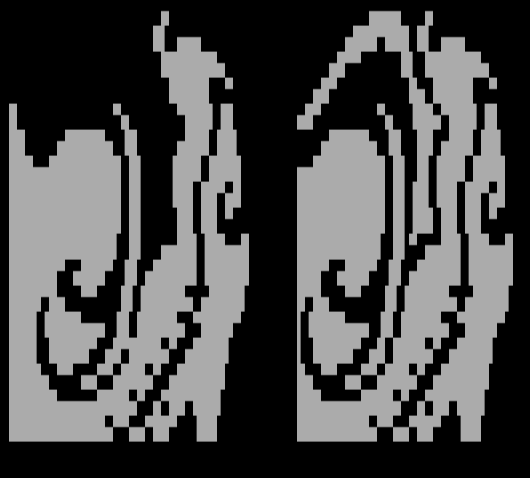
just follow the pattern like in the source
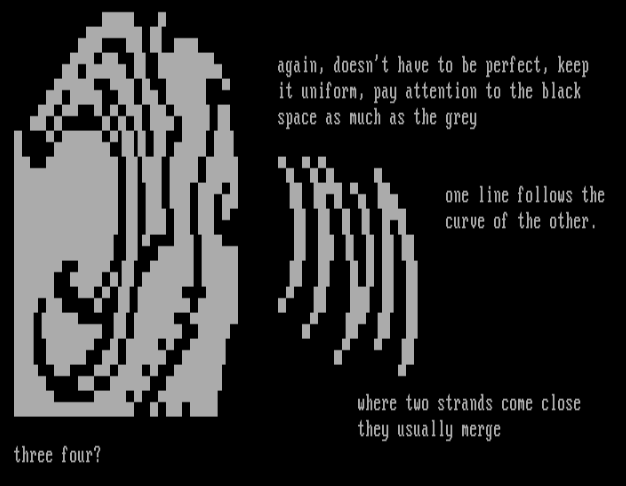
When two lines come close to meeting, I blur the lines a little bit with ░. Just for fun, not too much.
|

|
|

|
I'm still following the flow, strand by strand. Don't try to catch every line, just the major ones.
|
|
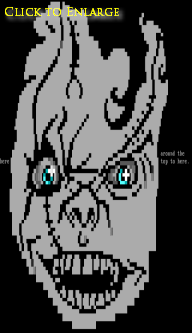
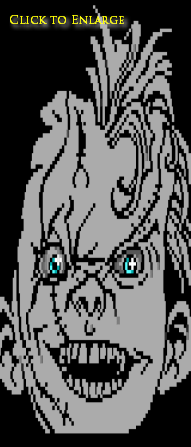
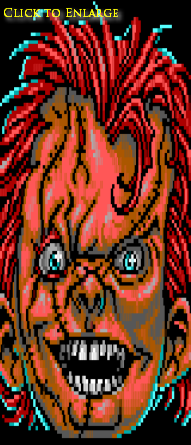
The hard part is done. We got our creepy outlines. Good job.
It takes a good eye to notice the `lines' of the picture. That's why comics are easy and a favorite for ansi artist's everywhere. Real people are a bit different but still follow the same procedure. You just have to be really careful about what you decide is black and what you can pick up when you are coloring.
Hopefully for this outline you can see what I decided to use, what to omit, and what to improvise. not everything looks good in ansi. By looking at the original source and this ansi you can detect what I decided to keep black. BUT now even more detail can be added with colors!
Pick an area, like the nose. It's predominately brown, so make it brown.
HINT: select the color you want, block fill an area and select attribute.
Then there's an area that's lighter than the surrounding area, make it lighter.
There's a highlight on the right nostril too, i'll use that. There's also a darker area on the base of the nose and inside. Make those an even darker shade. Given the area to work with depends on how much you can blend. I usually only work about 1 or 2 steps into the area I work on. F3 is helpful for a 1 step shaded blend. It's just f1-f3, rinse, repeat. It will take a good eye for shadows and highlights.
Cakewalk so far, look at the picture, try to recreate the colors, now blend.
Nose taken care of. Continuing the pattern, around the left eye.
|
So easy! Follow the principles on a larger scale.
|
|
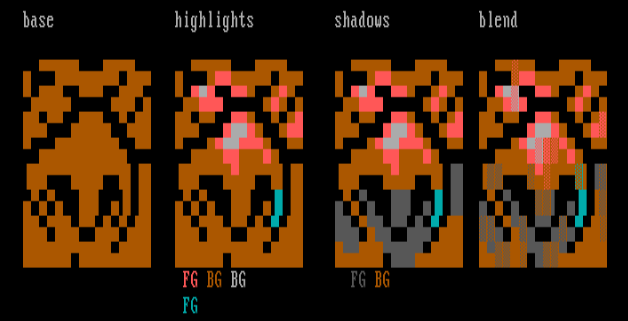
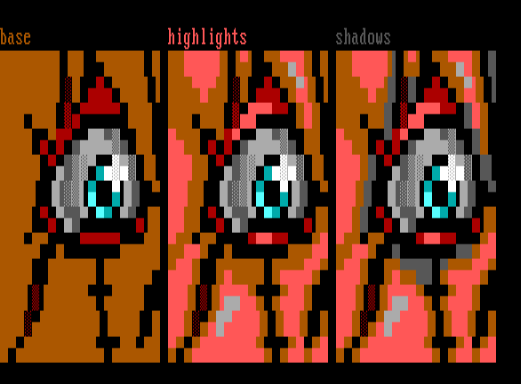
BASE: block fill your colors.
|

|
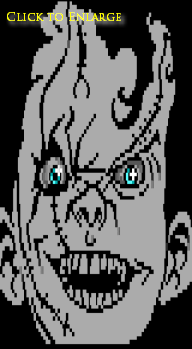
Highlights: Heh, I forgot stitches in the head. Just make more bright lines on the base with COLOR! YAY!
For the face, I drew patches of light color.
On the hair I used this color and teeth and cyan highlights.
I chose this picture because you can really see separation of colors in it.
|
|
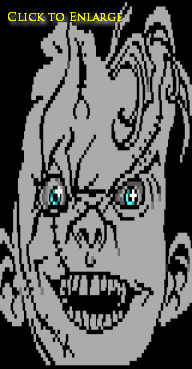
Shadows: I use dark grey for most shadows. Some people call it light black but I call it dark grey. /slingblade.
By picking a dark color for a base you can easily pick up the shadows with darkgrey. However red and blue are dark enough on their own that this is usually discouraged by some people. But again, I try to break rules. It often depends on the picture if you need an additional level of darkness.
Note: Any place that overhangs something else you should make a shadow, Example:
|
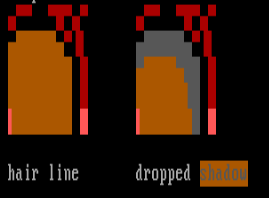

|
You can add highlights on top of highlights, amazing I know. I like grey. It's the brightest of all the dark colors and shades easily up to white for uber highlights.
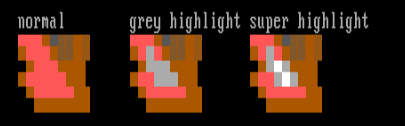
When you cram too many colors into a small area it can be hard to blend them together. However, it can give your pictures lots of depth.
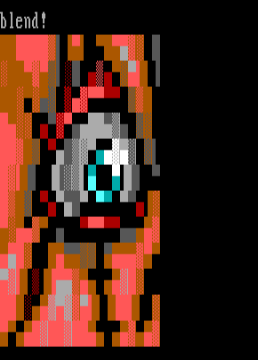
You're 99% done, all you gotta do is blend shit together or if you're like some people you can release this as is and call it new school. Hahah,lazy asses Really, most of my shading is super minimal. I like to keep most of the lines. I've drawn already, trying not to ruin it because I like the way it looks so far.
|
|
Shading Techniques:
Think of shading as just pushing two colors together like a paint brush blending and bluring the colors together.
Chain Combo!:
I think taintedx does this, try to create vertical smears that run as long as possible down the picture without altering much, just making it blur and run the colors down the page, it looks very cool.
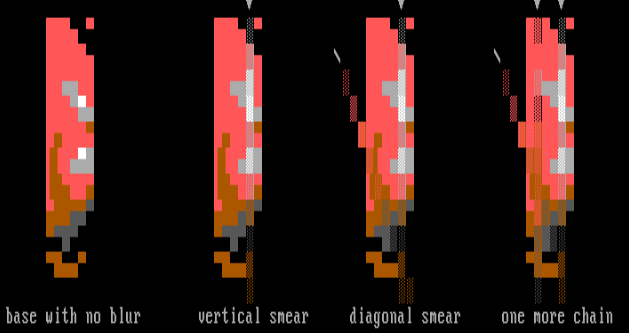
You can make your picture look very gritty by doing this alot, if you over-do it you'll lose some of the original outline, try every other line or every third line or just occasionally if you like that look.
There are many ways to blend,
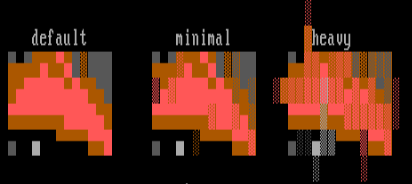
Shade too much and you'll lose some of your lines. looks messy.
Oh, someone told me NEVER shade horizontally. it's another rule I've been trained to follow but i encourage you to find your own style. I still try to never run too many f1-f3 blocks in a row.
An artist named halaster taught me about reversing dark colors to create blocks without a line.
Foreground grey f3 with black background looks like this ░
Background grey f1 with black foreground looks like this ░
Very, very similar, hardly noticeable except at a dos prompt where there's a dark edge.
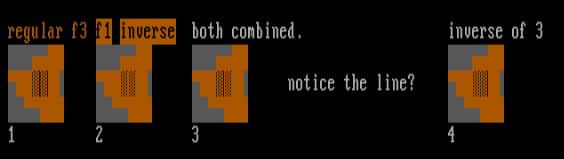
This may seem dated but some people are so picky so I decided to include this.
There it is, no big secret.
The best way to learn something is to do it, so go draw, GO! I also encourage you to draw with a friend, if you watch how they doodle you can pick up on their technique pretty fast. If you find me on irc and i'm in a drawing mood you can watch me or I can watch you and give you pointers.
Go doodle, and most importantly, turn on some good music and have fun.
Take your pics as far as you want and add a font! But that's for another tutorial.
Zerovision / Blocktronics
|